


The Typical Microblading Eyebrows Cost – Is It Worth It?
Posted on December 23 2019
When I think about microblading, I realize just how far the evolution of the eyebrow game has come along. My own brow-care regime has had its ups and embarrassing downs. First it was going-what-what-my-mama-gave-me natural. Then light tweezing. Then tweezing to the point that only a pair of thin, pencil-like lines remained where actual eyebrows should have been. In my 20s, I (thankfully!) managed to grow them back and moved onto proper waxing at the Benefit Counter Brow Bar, before upgrading to a full-service brow grooming at the Anastasia Beverly Hills Brow Studio. Their signature High Arch Brow stencil was my favorite.
But through all these iterations of eyebrow grooming, one thing never changed - sculpting that perfect arch took precision, patience, and lots of time. Okay, it's only 5-10 minutes of my morning, but have you ever thought about what else could be accomplished in that time? You could snuggle in bed for 5 more cozy minutes, or meditate, or eat an actual breakfast instead of just a coffee on the go. You could even be on time for work! The possibilities are endless.
Luckily, just when I was beginning to contemplate what I could do to reduce my eyebrow-grooming time, videos began popping up on my Instagram feed of technicians microblading eyebrows. All close-ups of happy women seeing their new, freshly-bladed brows, looking so happy and excited. And what? It's permanent? I mean, there'd still be some light tidying-up to do, but I could potentially wake up in the morning with eyebrows intact? Um... yes please! I wanted to get in on this immediately. And so began my journey to my now beautifully-microbladed eyebrows. (Oops, that sentence should have come with a spoiler alert - but yes they're beautiful, and yes I love them!)
The microblading cost
Before I jumped in the chair and had that needle-pen etching small strokes of ink on my eyebrows, I needed to do my research. First off, the price. Microblading costs can vary from city to city; I saw rates as low as $200 and as high as $1,500 per series. For me, both extremes were immediately excluded. I wanted to pay for quality and a professional with a good track record, but I wasn’t interested in overpaying for a Beverly Hills office either.
Like most modern women, my research was almost exclusively on Instagram. I scoured #microblading for months, checking out technicians and their work. We're talking about doing something permanent to your face here - I wasn't about to bargain hunt for it. Instead, I focused on the results I was seeing. Here were some of my criteria: How long had the technician been microblading eyebrows? Were they truly customizing the brows based on the customer, or just giving everyone the same brow? And yes, the practical stuff too. How far was the salon/office/studio from my house? How much did their microblading cost, and did it include a touch-up session as well?
After a year of looking - yes, ONE YEAR - I finally settled on my microblading magician, Pia Rotman of Pia Rotman Ink. She is an educator for Everlasting Brows, was reasonably priced at $545 from beginning to end including the touch-up follow-up, and amazingly enough was only 5 miles from my house. She was booked one month out (annoying, but a good sign!) so I made my appointment and waited patiently. Or at least tried to. Truthfully, I was giddy with anticipation. I'd wanted this for so long and I was excited to finally take the plunge.
What is microblading? A look inside my session
Pia's studio was located in a dermatologist's office, which made me feel extra secure. I was lead down a short hallway into a beautifully-decorated, open office space with floor to ceiling windows. In the middle of the room was a chair, very similar to a dentist's, with a ring light hanging over it. Pia was great at making conversation and I felt very reassured.
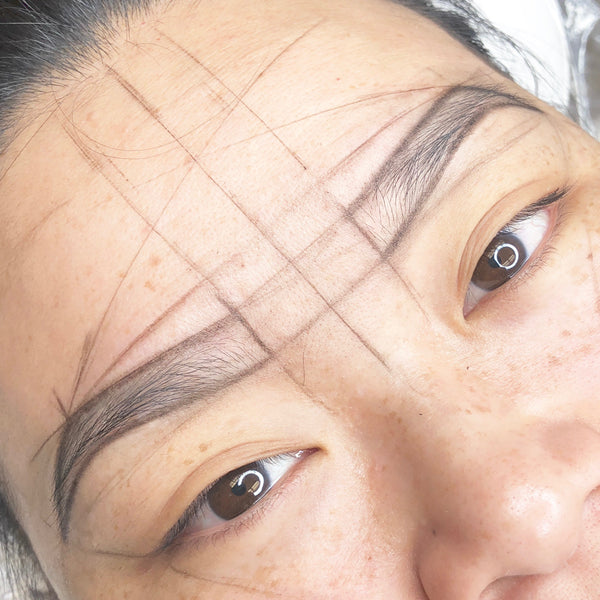
She first spoke to me about how I wanted my brows to look and asked if I had brought any pictures along. I personally like a high arch, bolder eyebrow that’s a little darker than most would wear. She explained that she would first map my eyebrows with a piece of thread, numb them, and then begin the microblading.
I was mesmerized by this mapping process. It looked so intricate and complicated – so much so I’m not even going to try to explain it, except to say that it probably took about 30-45 minutes. Once that was complete, Pia gave me a handheld mirror to approve the shape. I asked for a couple of tweaks but overall I thought it was great.
After the mapping came to the numbing ointment, and we had a chit chat for about 15 minutes while it kicked in. Why do you need this? Because it’s microblading. There is a pen full of needles that slightly slice your skin to insert ink pigment into it. It's similar to the process of tattooing, but definitely not as painful and there is no scary buzzing sound.
After 15 minutes, Pia wiped away the excess ointment and we got down to microblading my eyebrows. After the first incision, she asked if I could feel anything, and I honestly hadn’t even realized that she had started. 20–25 minutes later she was satisfied with her work, and handed me another mirror to take a look. They were beautiful and almost perfect. I requested a couple of tweaks and said I wanted them to be a bit bolder, and she got to work again.
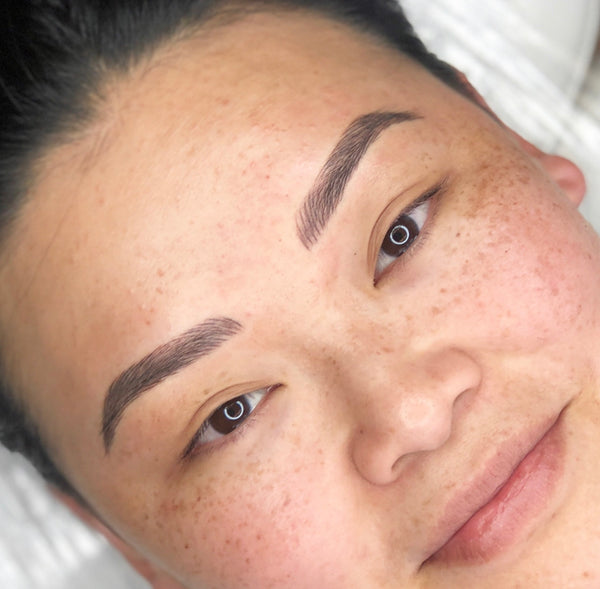
In the end, she added some additional brown ink over my brows and, with the signature reveal you’ve seen in countless videos on Instagram, I saw my newly-microbladed eyebrows in all their glory. I was so excited and I loved them so much!
All and all, the whole procedure took about 2 hours. Pia gave me detailed instructions on how to care for my new brows until our follow-up appointment six weeks later, and then it was time to leave and reveal my glam new self to the outside world.
All and all, the whole procedure took about 2 hours. Pia gave me detailed instructions on how to care for my new brows until our follow-up appointment six weeks later, and then it was time to leave and reveal my glam new self to the outside world.
Caring for eyebrows after microblading
Once I got home the maintenance began. After microblading, eyebrows need special care for a little while – this is just as important as the appointment itself in achieving a fab result. For the first 4 weeks, I protected my eyebrows at all costs – adding ointment to them to ensure they never dried out, always wearing a hat when going outside, and showering with a piece of plastic wrap over my eyebrows so shower water would never touch them. I only allowed myself gentle splashes of sink water while washing my face to keep them clean.
Due to my diligence, I never peeled during the entire process. I was actually alarmed at first, as all the blog posts I had read mentioned so much peeling that after day 10 you look like you don’t even have eyebrows! But not for me, my glorious new brows stayed pretty perfect throughout. They faded towards the end of the 6-week healing period, but that was easily fixed at my follow-up appointment. This time, I only stayed for 30 minutes, enough time to darken my eyebrows and that was it.
Is the microblading cost worth it?
To answer the question “what is microblading?”, it’s the future of eyebrow shaping. I truly believe that! I could not be happier with my experience overall. Yes, the price tag seemed a little high at first, but it was well worth it. This is something you definitely do not want to bargain shop for. Just find someone whose work you like or who you trust, and ideally someone who has been microblading eyebrows for quite some time. And, of course, be diligent with your after-care. You will not be disappointed.
I would recommend microblading over and over again, and in fact I have. To date, about six of my girlfriends have gone to Pia and all are happy and satisfied with her work. If you are looking for a great solution to perfect (even when you wake up!) eyebrows, I recommend microblading. Seriously, it feels like a life saver. And definitely a time saver.

More Posts

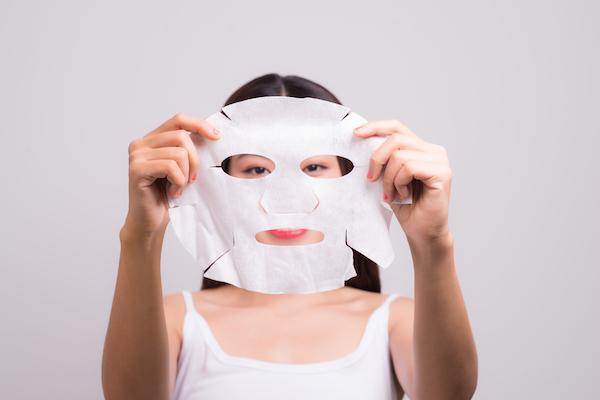
The Best Sheet Mask for Hydration: 5 Reviews
Annie Le
Posted on January 01 2020
You’ve probably seen them everywhere, if not displayed in the beauty aisles of your loc...

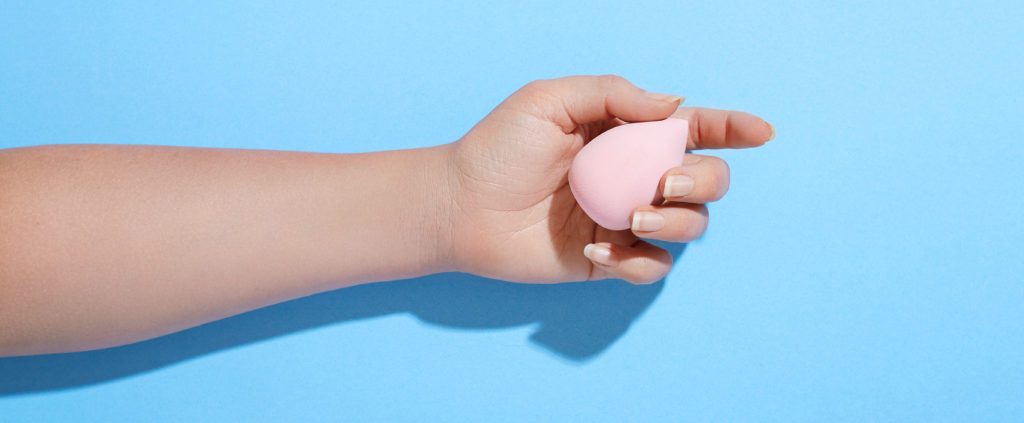
How to Choose and Use a Beauty Blender
Annie Le
Posted on December 06 2019
Originally the brainchild of makeup artist Rea Ann Silva, the Beautyblender is a tool t...